
If you already own a good bicycle that you don’t use much anymore and would like to own an electric cycle, converting your cycle to electric may be the way to go. Sold at a much lower price than completely new bicycles, conversion kits are a super attractive option for those looking to add electric power to existing pedal bicycles. This article will help you through the entire process right from choosing the right parts to finally enjoying your converted e-cycle.
Any e-bicycle conversion kit has few essential components – the battery, the motor, the motor control unit, sensors such as throttle, and charger. More details about the same are available in this article. Based on your requirements, the correct conversion kit must be purchased. Entry level conversion kits in India include a 24V DC motor that attaches to the side of the rear wheel and come without any pedal assist sensor. A good quality conversion kit comes with a 36V, 250W rear hub BLDC motor, 5 level pedal assist sensor, waterproof cables, and many other features to enhance your riding experience. In this article we will be focusing on installing the rear hub BLDC motor conversion kits.
Converting your Cycle to Electric
Generic Hailong Case Battery Conversion Kit
This kind of electric cycle conversion kit typically ships with multiple loose parts that may or may not be compatible with your existing cycle.
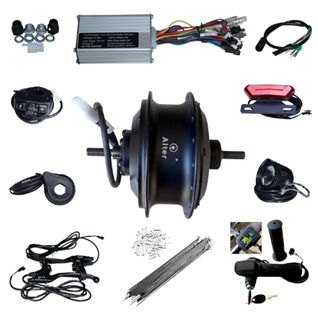
A generic conversion kit contains the motor, motor control unit, accelerator/ throttle with integrated display, cut-off brake levers, pedal assist sensor, and a headlight. The supplied cables are usually non-waterproof. No charger or batteries are included and have to be bought additionally. The wiring of the whole kit can be difficult and require outside help.
Step 1: Lace motor in rear rim using the provided spokes as per your bicycle size

The hub motor has 36 holes and is compatible with rims with as many holes only. In case the rim of your current bicycle has more or lesser than 36 holes, a new rim must be purchased. Lace the motor with a pattern that repeats after 4 spokes. Attach disk brakes and free wheel to new motorized rim. Attach tire and tube in the new rim. A tight fit of the spokes is extremely crucial for converting your cycle to electric successfully.
Step 2: Attach wheel back in bicycle rear
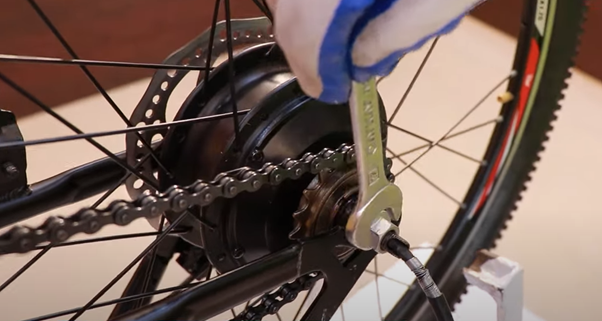
Step 2: Attach wheel back in bicycle rear
Insert the motorized wheel back in the bicycle frame, ensuring that the motor cable points towards the ground. Align the wheel with the brake pad and true it to the travel direction using the provided nuts, washers, and nut covers. Ensure there is no noticeable wobbling of the wheel.
Step 3: Install Pedal Assist Sensor
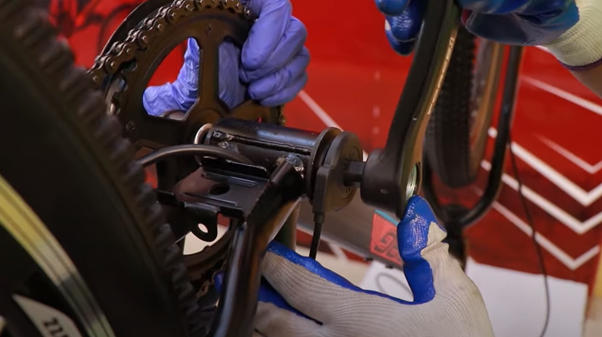
By removing the pedal from the bottom shaft using the appropriate tools, a pedal assist sensor can be installed as shown above. Pedal assist sensors usually compatible with cotterless pedals. The pedal assist sensor senses the cadence speed of the bicycle and provides a boost to the motor accordingly. The cadence sensor must go on the opposite side of the chain.
Step 4: Install cut-off brake levers on handlebar
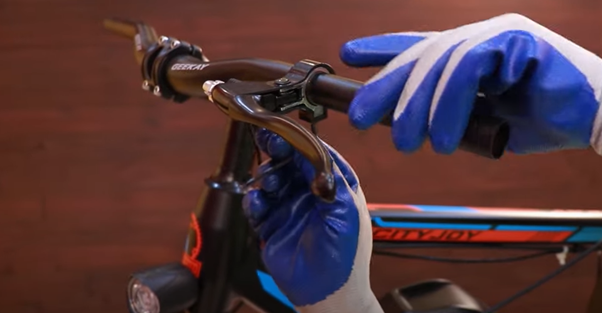
Remove all existing components from the handlebar such as grips, brake levers, bell, etc. and insert the electric cut-off brake levers on the either side of the handlebar. These special brake levers cut off power to the motor when applied, keeping you safe from incorrect motor signals. The brake cables can be re-installed just as before.
Step 5: Install throttle/ accelerator
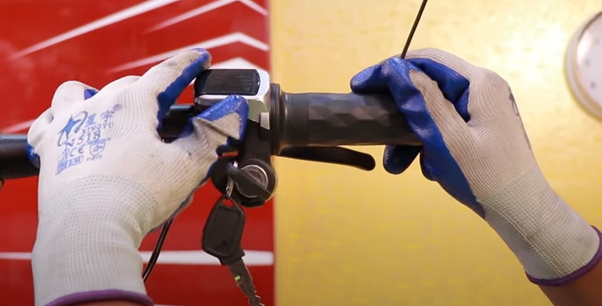
Once the brake levers have taken their place on the handlebar, insert the throttle on the handlebar. Check the direction of rotation of the throttle to determine which side this should go on. In countries that allow it such as India, the throttle is the best experience in converting your cycle to electric to make you feel as if riding a moped. Tighten the throttle using the provided allen keys.
Step 6: Install light and horn component
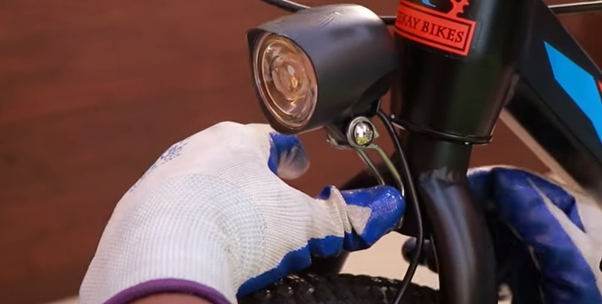
The light and horn in generic kits come in a single component that attaches to the front of the bicycle (front suspension). These are operated using a switch installed on the handlebar containing the corresponding icons. Install the light and horn to the front suspension fork using provided nuts and bolts.
Step 7: Connect all installed components to the motor control unit
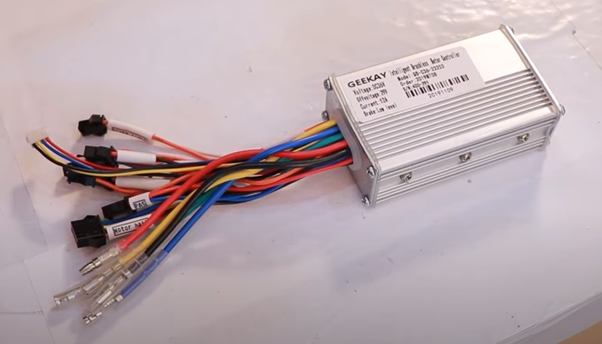
The motor control unit is the brain of the complete e-bicycle. It takes in various inputs from the rider, calculates the desired motor speed and then ensures that the motor rotates at the calculated speed. In converting your cycle to electric, the MCU can define the complete experience. Installing the MCU is the most cumbersome part of the whole conversion process as it requires the user to make multiple complicated wire connections in order to carry out the conversion.
Step 8: Install battery holder to down tube
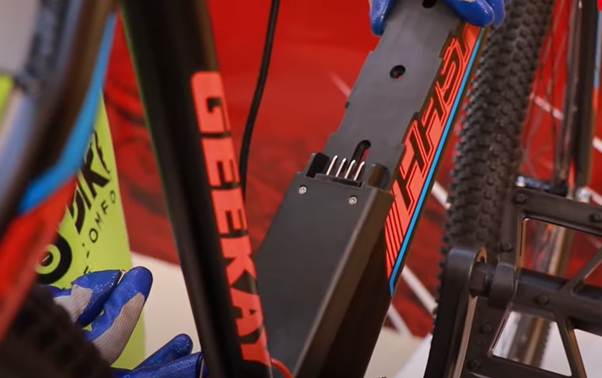
The hailong case battery or the bottle battery as it is more commonly known as, is only compatible with certain bicycle types. The bicycle must have plenty of space above the down tube to accomodate the battery case. Additional processes such as drilling or welding may be required to fit the hailong case. If these options are not feasible for you, a fabric battery pack can also be used.
Step 9: Insert controller in controller box
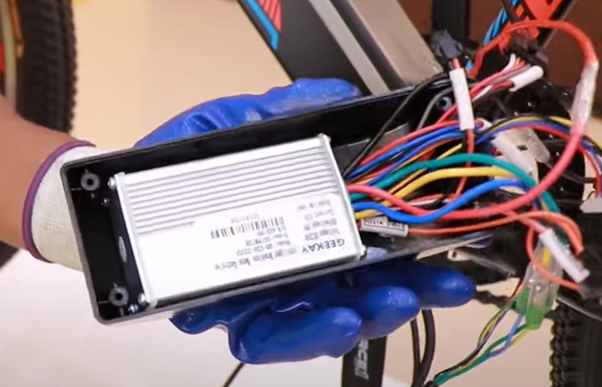
The final component to add to the bicycle once all connections are made, the MCU needs to be inserted in a controller box and attached to the seat tube of the bicycle. With this step, you have additional components on the handlebar, down tube and seat tube of the bicycle.
In this conversion you can expect to spend more than 2 hours of time and still get a non-weather proof product, heavily restricting your rides to certain times of the year.
PedalX PowerUp! Conversion Kit – The optimum method for converting your cycle to electric
The PedalX PowerUp! conversion kit can be installed in lesser than 2 hours and significantly makes life easier for our customers.
The first 5 steps of the installation are same as above.
Step 6: Install mounting bracket
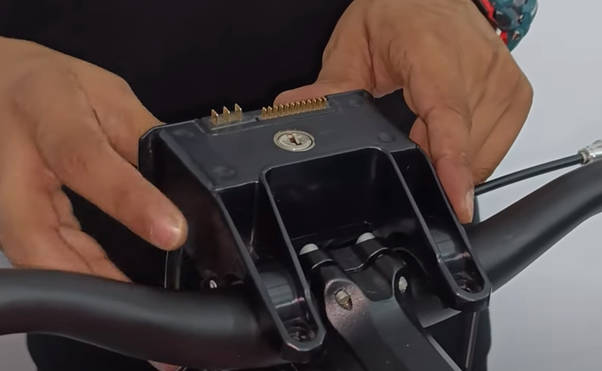
Install the provided mounting bracket and connect all sensors to it by matching the connector colours. The mounting bracket acts as the bridge between the motor and other components on the bicycle with the PowerUp! pack housing the battery and MCU of the bicycle. That’s it, your converted e-bicycle is ready to be used.
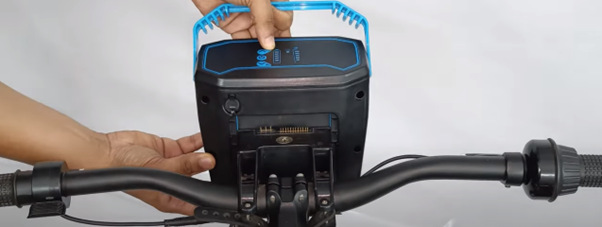
The provided PowerUp! has pre-installed battery and motor control unit that instantly connects with the rest of the bicycle when connected to the mounting bracket. The supply of power to the motor is instant and you are ready to go.
The PedalX PowerUp! is available for purchase on Amazon.
At PedalX, we are committed to continuously developing and bringing to market more innovative products such as the PowerUp! that fulfils the needs of the Indian customer. We are completely designed and manufactured in India. Visit us on social media to know more or give us a call on +91 84528 45126


Pingback: Top 5 Best Electric Cycle Conversion Kits Available in India - PedalX | Electric bicycle technology